
How to Prepare for Your Arrival in El Salvador
Landing at SAL airport can feel like a blur, especially when your bag, passport, and phone are all in different places. I still remember that mix of jet lag and airport noise, with everyone moving fast and no one saying much.
First immigration, then baggage claim, then meeting your driver pickup at the hotel transfer point. If you check passport validity and entry rules before you fly, the arrival feels a lot less stressful.
That last part matters more than you think. When I finally spotted the driver at the meeting point, the whole trip got calmer in a second, like the airport noise just faded away.
Key Takeaways
- Check your passport before you fly, just to avoid a nasty last-minute surprise.
- Keep your visa cash and arrival details ready if they apply to your trip.
- Go through immigration first, then baggage claim and customs. That order matters, and the airport crowd moves fast.
- Meet the driver at the Pizza Hut kiosk pickup point. It’s an easy spot to miss if you’re tired and hearing a dozen trolley wheels squeak by.
- Save WhatsApp and email contacts offline, because airport Wi-Fi can be patchy when you need it most.
- Update flight changes early, so you don’t end up with extra fees or a confused pickup.
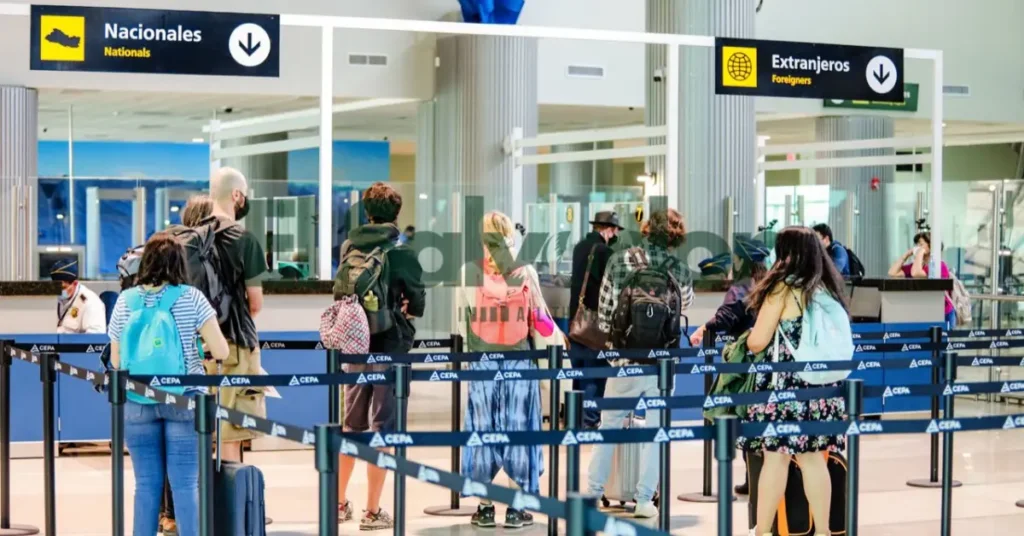
👮🏼♀️ Step 1: Immigration and Entry Rules
At SAL airport, Monseñor Óscar Arnulfo Romero International Airport, immigration comes before baggage claim, so keep your passport and arrival papers ready at the immigration desk. The usual flow is land → immigration → baggage claim → customs → exit, and it’s often quick if your documents are in hand.
What I had ready at passport control
- Passport: It should be valid for at least six months, according to official travel guidance.
- Tourist visa fee: $12 cash USD, where applicable.
- Onward travel proof: A return ticket or next flight details can help.
- Accommodation details: Have your hotel name or address ready.
If they ask for more documents
- Stay calm and answer clearly. The officer may just want a quick check.
- Keep your papers together, so you are not digging through your bag.
- After immigration, you can head to baggage claim, then customs, then exit.
Visa Entry Fee for Tourist Visa on Arrival
Most travelers pay a $12 tourist visa fee on arrival, and it is usually collected in cash USD. Keep small bills handy, because border payment options can be limited and the line moves faster when you are ready. Understanding El Salvador currency ahead of arrival helps because the tourist visa fee is usually collected in small cash USD bills.
- Who pays: Most visitors need to pay the $12 tourist visa fee when they arrive.
- Who may be exempt: Salvadorans by descent may avoid the fee if they show a DUI, or a copy of a parent’s Salvadoran passport photo along with the Documento Único de Identidad details.
Required Documents for Immigration
- Valid passport, with at least six months left before it expires. I once heard a hotel clerk whisper, “Double-check that now,” while the lobby smelled like coffee and rain.
- First-night accommodation address and the hotel name, ready on your phone and on paper. Screenshots or printed copies of the booking details help if the signal drops.
- Onward travel proof, such as a return flight or next ticket. Border staff may ask for it, so keep it easy to show.
Keep these documents within reach, not buried in your bag, because you may need them fast at the counter.
What to Do Before You Fly to El Salvador Airport
Before you fly, I always double-check the small stuff that saves big stress later. The airport line made it feel way worse than it needed to. These are exactly the kinds of things to know before visiting El Salvador that make
- Check passport validity. Your passport should be valid for at least six months, so look at the date before you pack.
- Review entry rules and visa fee details. If a tourist visafee applies, it’s $12 cash USD, so keep exact bills ready. See the visa fee and required documents notes.
- Save arrival details offline. Screenshot your booking, pickup confirmation, and hotel address, then keep an offline copy on your phone in case Wi-Fi is slow.
- Save the driver contact. If you arranged a ride, keep the pickup confirmation and driver number handy. I learned that from a sleepy taxi driver who said phones die at the worst moments.
- Print key documents too. A paper backup can help if your battery is low or airport internet is patchy.
That little prep made arrival feel calmer, with less fumbling at the curb and less standing around with bags digging into my shoulder.
Step 2: Customs and Baggage Claim
After immigration, follow the airport signs to baggage claim first. That’s where you pick up your luggage before heading on to customs.
Just keep an eye out for official counters and signs. In most airports, the flow is simple: after immigration, collect your bags, then continue through customs. It usually sounds busier than it feels, with rolling suitcases, little speaker announcements, and people stopping to check the screens.
🚙 Step 3: Meeting Your Driver at Pickup
Exit airport and turn right, then head for the Pizza Hut kiosk. That was the meeting point every time I saw it, and the little crowd there made it easy to spot.
- Look for the Pizza Hut kiosk first. It’s the clear pickup point.
- If you don’t see the driver, call or send a WhatsApp message right away.
- Check the name sign closely, since one small typo can cause a mix-up.
If the driver isn’t visible, help is usually close by, so don’t worry. I heard a few travelers ask staff near the exit, and they sorted it out fast.
How to Coordinate Your Pickup if Your Plans Shift
If your flight change happens, send the update as early as you can. I once watched a driver wait near a sticky airport curb while the arrivals board kept flipping, and the whole thing got messy fast.
- Send the new flight number. That helps us track the right arrival time.
- Share your updated ETA. If you know the delay, send it by WhatsApp right away.
- Include the terminal if it changed. That saves back-and-forth driver communication.
- Tell us if the flight is cancelled or rebooked. We can then adjust the pickup update.
Travelers comparing Uber vs rental car in El Salvador should remember that airport pickups and delay coordination are usually easier when transport is arranged in advance. That small message makes a big difference, and it cuts down confusion for everyone waiting outside in the heat or rain.
One important note, a waiting fee applies after more than 1 hour if we are not informed. So if your arrival time shifts, send the update as soon as you can.
What to Expect After You Leave the Airport
Your airport transfer is really the last step before hotel check-in, and it sets the tone for the rest of the trip. After landing, the car ride felt like a quiet reset, with a local driver pointing out streets and answering small questions I didn’t even know I had.
- Your first ride usually moves you straight from airport noise to hotel calm.
- A friendly driver can take a lot of stress out of arrival, especially after a long flight.
- That first look at the city is often your first impression of El Salvador.
Planning how to get around El Salvador before landing makes the airport-to-hotel transfer feel much smoother after a long flight.
Extra Arrival Tips for Currency, Language, and Safety
USD is the official currency, and Bitcoin legal tender is part of daily life here. A taxi driver at the airport once smiled and said small cash makes the first ride easier, especially if you want a comfortable ride without fumbling for change.
- Carry small USD bills. They make tips, snacks, and short rides much easier, especially after a long flight.
- Expect Spanish first. Spanish is the main language, though some tourism staff speak English, especially around the airport and hotels.
- Keep your pickup details offline. Saving pickup details offline matters even more if your El Salvador SIM card has not been activated yet after landing.
The airport area felt safe the times I passed through, and the professional drivers I met were calm and clear about where to stand.
Ready to Begin Your El Salvador Adventure?
Once the details are set, the rest feels lighter. I still remember the first time I stepped out for a beach day and heard the surf before I saw the water, and later that same week a volcano hike left dust on my shoes and a grin I couldn’t shake.
That’s the part I like most about Tunco Life – El Salvador Tours, it takes away the guesswork when you land. So you can relax into a cultural city tour, follow the road to the beach, or head out without worrying about the first step.
Frequently Asked Questions
When you layover in San Salvador, do you have to go through immigration again and get your checked bags?
If your trip includes a true layover, the answer depends on your ticket and whether the airline checks your bags through to the next flight. For immigration and baggage rules, I’d double-check your airline and the official entry guidance before you land.
What do US citizens need to enter El Salvador?
US citizens should follow the official entry rules for their trip, since requirements can change by nationality and travel purpose.
How many terminals are in San Salvador Airport?
SAL airport is pretty straightforward, but terminal details can change over time. I’d confirm your departure or arrival terminal with your airline or airport info so you’re not guessing at the curb.
Is SAL airport easy to navigate?
Most travelers find it manageable, especially if they know where they’re headed before arrival. It usually helps to keep your pickup or meeting point in mind, since that cuts down on wandering.
Is terminal 2 the new terminal?
That depends on the current airport setup, so I’d avoid assuming it’s the newest one. Check your airline or airport notice for the latest terminal assignment before you go.